.svg)
Here we will go through the steps required to install ExmonDG from the install wizard
The first step is to contact help@exmon.com and request an on-premise ExmonDG installer.
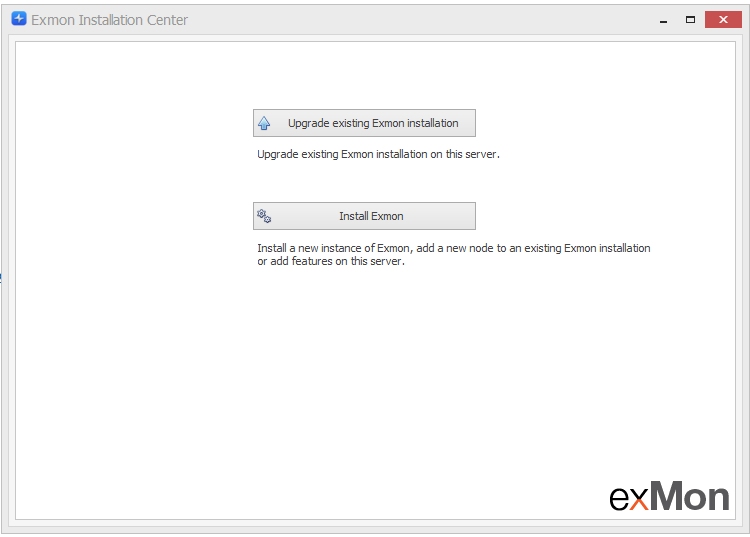
When you open the installer you receive a wizard that will guide you through the installment:
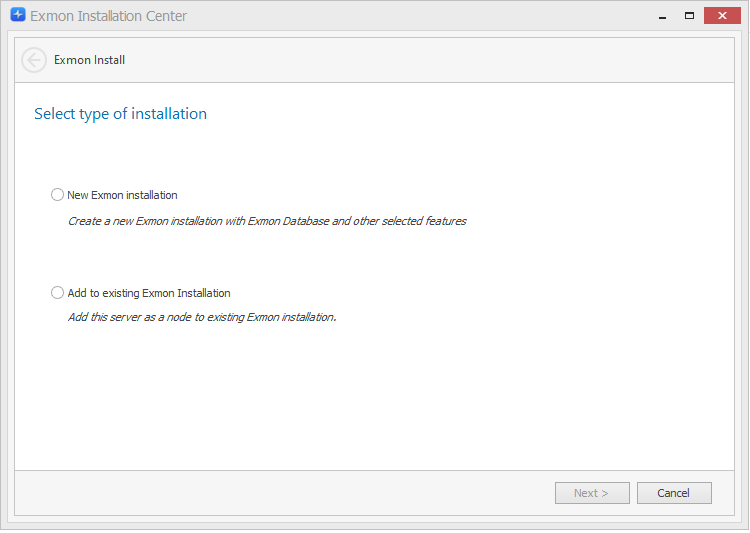
- Select Install for fresh install
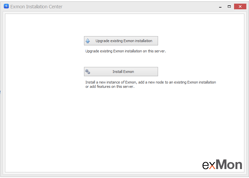
- Here you want to select New Exmon installation(the other option we go through Installing Execution Connection)

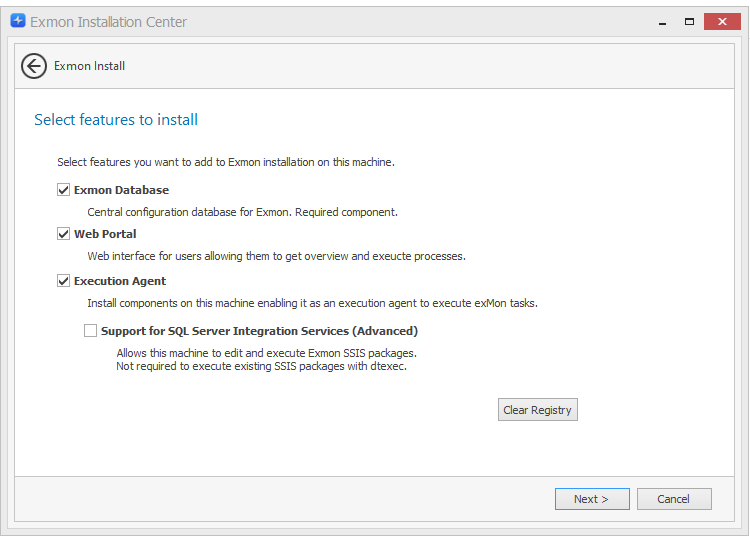
- This page is asking us which features we want to install on the server. For first-time installation, we want to select the 3 major features and skip SSIS.

- A prerequisite check is done to ensure everything required for Exmon is installed on the machine. The most common issue here is that IIS does not have all the required features installed.
Note: If you get a warning for ASP.NET you can still install it, just ensure it has been installed to the IIS before continuing.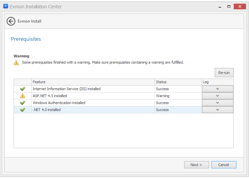
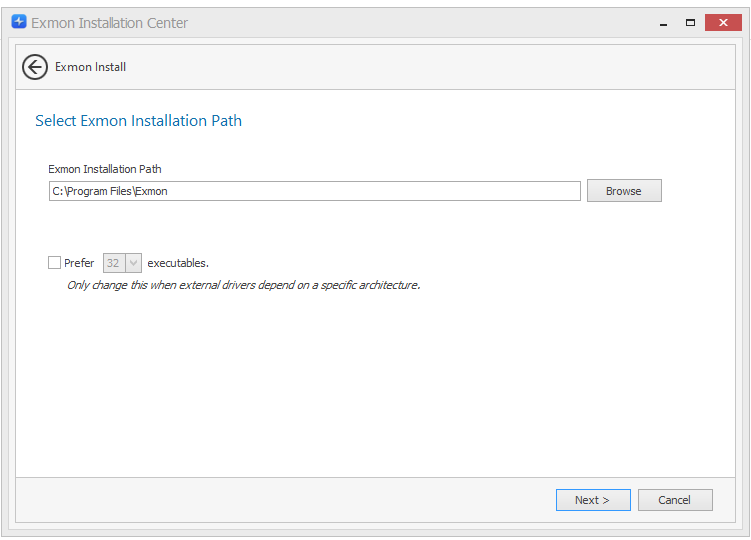
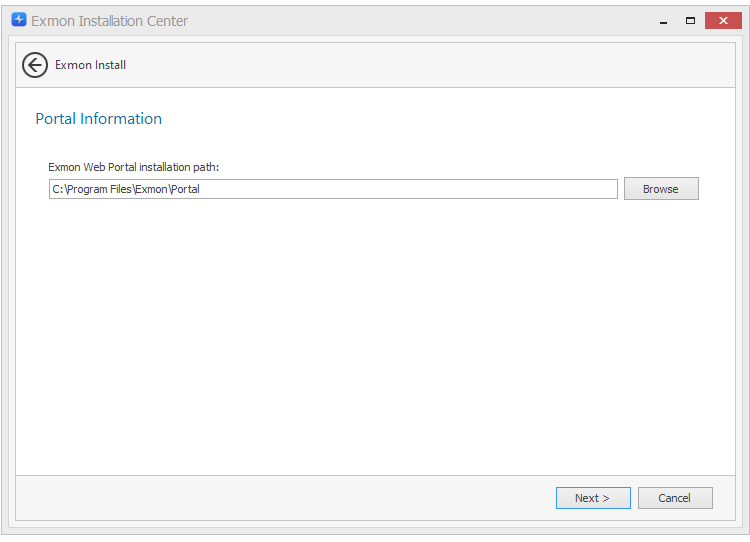
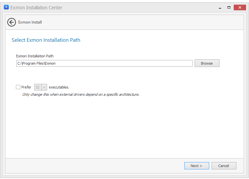
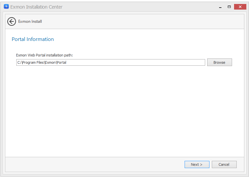
- Exmon and portal path can most of the time be left unchanged
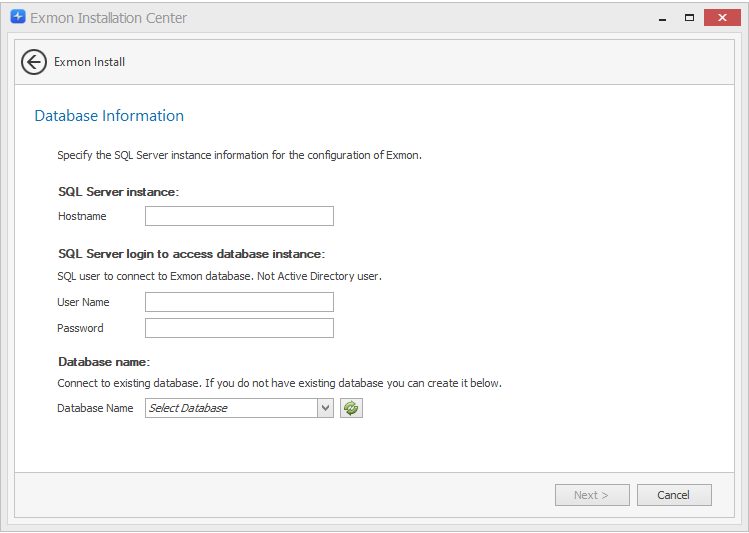
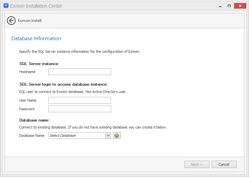
- This step is the most crucial step. Here you need to input the hostname for the ExmonDG application database SQL server as well as a username and password to a user that has db_owner access to the ExmonDG application database. When that is done, select the database in the dropdown at the bottom
- You can configure the SMTP email settings that Exmon will use. A common problem when installing ExmonDG is that the SMTP user has not been created yet, in which case we can just skip this step and fix the SMTP settings later.

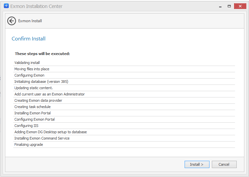
- And then you can press Create and afterward open ExmonDG Desktop