.svg)
In this article, we will guide you through the process of creating and filtering tags in Exmon DG Web, allowing you to enhance your exception management and project oversight.
Creating Tags in Exmon Data Governance
Creating tags in Exmon DG Web is a straightforward process that empowers you to categorize and label exceptions efficiently. Here's a step-by-step guide on how to add and create tags in Exmon DG:
- Open Your Task: Begin by opening your query or compare query to which you want to add tags.
- Select Exceptions: Select one or multiple exceptions that you wish to tag.
- Access the Tags Menu: Look for the "Tags..." button within the Exmon DG interface. Click on it to access the tags menu.

- Create a New Tag: Depending on your needs, you can choose to create a new tag or select an existing one from the dropdown list. To create a new tag, simply enter the tag name in the input field and press the Enter key. Now you've just created a new tag!
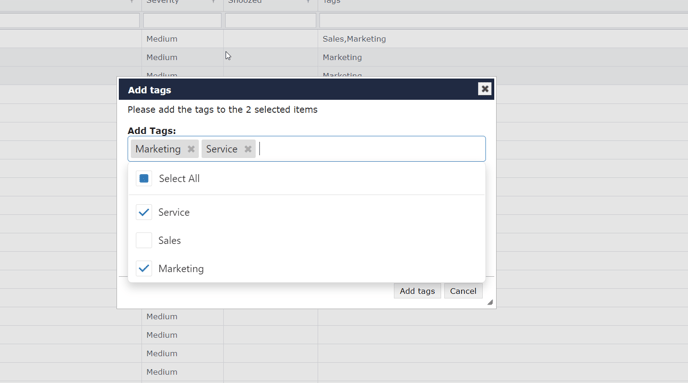
- Removing a Tag: To remove a tag, simply click on the tag you wish to erase, and it will be removed from the exception.
- Add Tags: After creating, selecting or unselecting the relevant tags for your exceptions, click the "Add tags" button to apply them. These tags will now be associated with the selected exceptions.
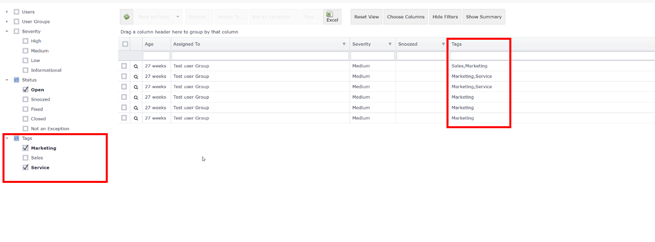
In the "Tags" column, you'll find a list of tags associated with each exception.
Filtering Exceptions by Tags
Once you've tagged your exceptions, Exmon DG Web offers multiple ways to filter and manage them efficiently:
- Using the Funnel Icon: In the "Tags" column, you can select the funnel icon. A dropdown menu with your tags will appear, allowing you to choose the tags you want to use as filters. This helps you focus on specific exceptions based on their tags.
- Direct Tag Entry: In the input field located at the top of the "Tags" column, you can manually type the tag you're looking for. This will instantly filter the exceptions, displaying only those associated with the specified tag.
- Show Filters Option: Click on the "Show filters" button to reveal a list of tag checkboxes. By selecting the checkboxes corresponding to your desired tags, you can quickly filter out exceptions, making it easier to manage and prioritize them.
Managing Tags on the Exception Detail Page
When you navigate to the Exception detail page, you'll encounter the same tagging process. In there, you'll see an overview of the tags connected to the exception. Moreover, you can add new tags to the exception using the following steps: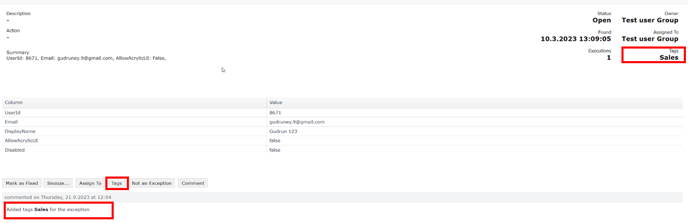
- Click the "Tags" button to access the tag menu, similar to the process described earlier. This menu allows you to create, remove and apply tags to the exception. To remove a tag, simply click on the tag you wish to erase, and it will be removed from the exception.
When you make changes to tags, they will be recorded in the Action History on the Exception Details page. This allows you to track when a tag was added or removed from the exception.