.svg)
Created by: Kristinn Magnusson
In this tutorial, you will create a Compare Query which compares two data sources containing customer information and finds all discrepancies in the data.
Compare Queries can be used to validate that sources are identical. For example, you can ensure that customer details are identical in two systems or that aggregated sales per month from a sales system are similar to data in billing.
When you are finished, you will have a test that validates that customer information is equal in two different systems, and notifies an owner about all discrepancies.
Note: Compare Queries allow you to compare two data providers, that should contain similar data, and report on their differences.
- Create a Basic Compare Query
- Data Sets
- Column Mapping
- Preview Mode
- Comparing to sub-sets
- Compare Query Output
- Exception Management
Create a Basic Compare Query
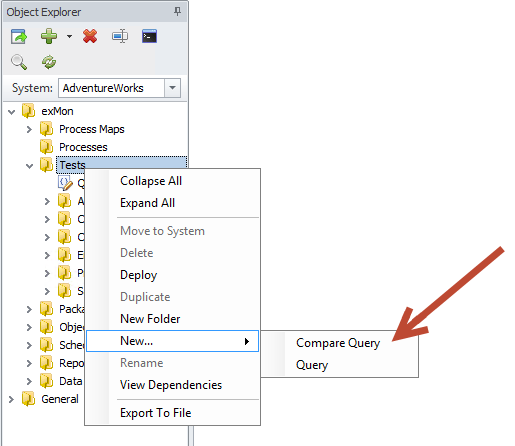
- Right-click the Tests folder
- Select: New → Compare Query
- Give your query a name and click Ok
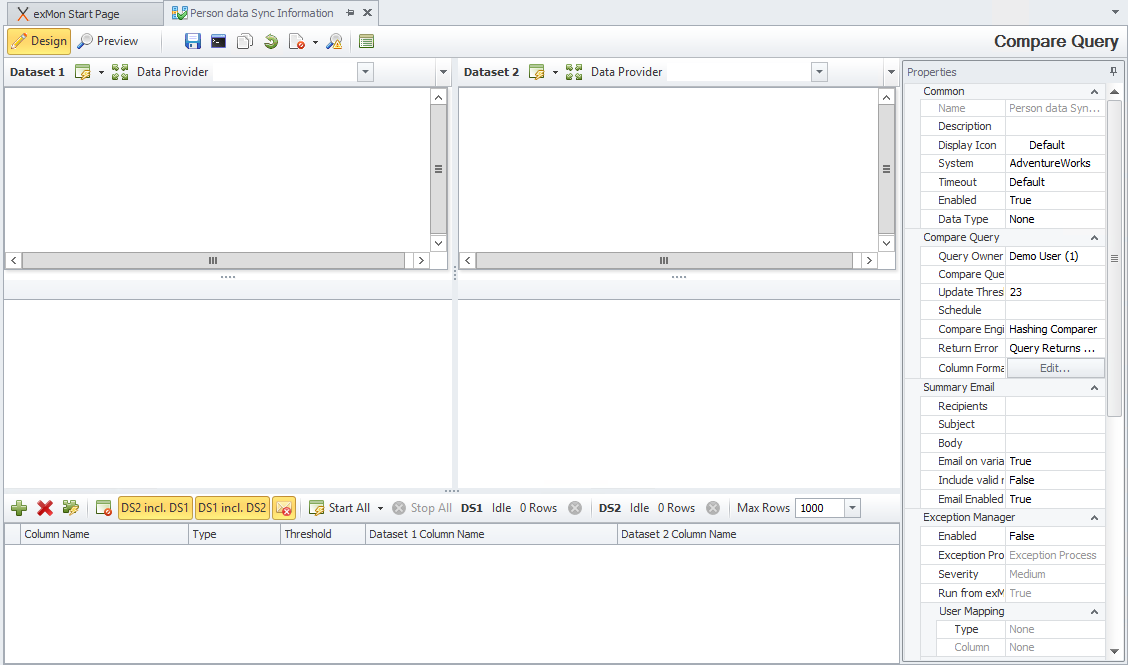
A Compare Query consists of:
- Two data sets (DS1 and DS2), both contain a Data Provider and a query to that provider that should return comparable data.
- Column mapping between the two data sets.
Data Sets
Data Provider is a query you can use to retrieve data in a structured format. For example, this can be a SQL Server, Oracle server, PowerShell script, Excel document or an OLAP cube which is queried with MDX.
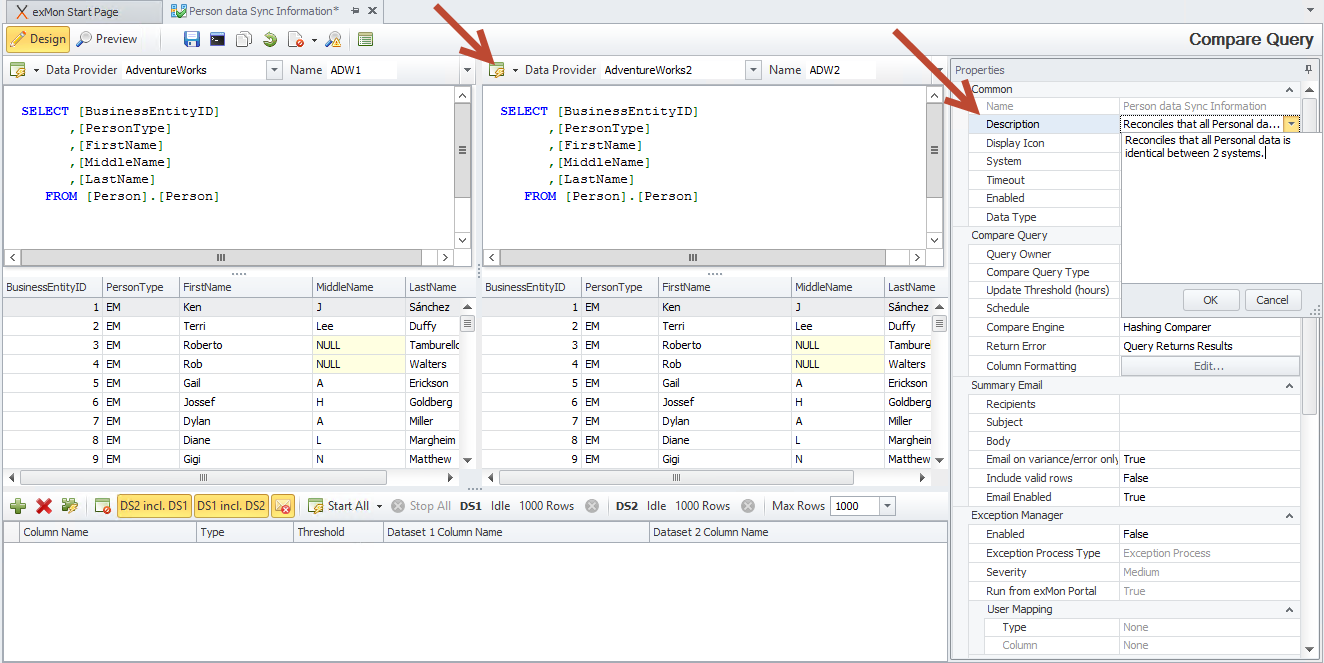
You then select the data provider for each query and write a SQL query to retrieve customer information from the source systems. You can test your SQL query by pressing F5 or clicking on the lightning bolt icon.
Recommendation: Make sure you name the data sets to describe the origin of the data to the end-user.
In the example below, we have named DS1: ADW1 for Adventure Works 1, and DS2: ADW2 for Adventure Works 2, two separate instances of some business database. Make sure that you also write a short description of the purpose of this compare query.
Column Mapping
After querying your two data providers, you need to map the columns together to be able to compare the results. You can do this manually by adding column by column, or you can use the Automap function. This function allows exMon will intuitively predict how the data sets fit together.

For each column we map, we can choose between three mapping types:
- KEY columns are one or many columns that create a unique identifier for the data. This can, for example, be customerID in customer data, or a multi-part key consisting of productID and a year in data consisting of sales per product. Each compare query must have at least one KEY column mapped.
- VALUE columns are not a part of the unique key for the data but are needed for the query. This comparison can be between strings, dates or numerical values. Variances in numerical values, for example, amounts, are aggregated and summarized in the results. String values are being compared in the screenshot above. Specifically, the PersonType and Name columns.
- INFO columns provide additional context and information to help the user to understand their results. For example, in a Compare Query comparing products you could include the product name, even though you are not comparing those between data sources. You will not use an INFO column in this tutorial.
Threshold
If a VALUE column is numeric, you can define a threshold for the acceptable variance; either as an absolute number (0.1) or a percentage (0.1%). By setting a threshold, you are defining how much variance is acceptable between the columns before exMon registers an error.
This can be helpful when comparing calculated values with the need to allow for a rounding difference of 0.1 or 0.5%.
Preview Mode
You can always test your Compare Query by using the Preview mode.
Click Preview to test the Compare Query. By default, it runs against Development Data Providers but you can also select Production.
To re-run the preview, click Start.
With preview mode you can see errors and variances created, see all emails generated and how it affects exception management.

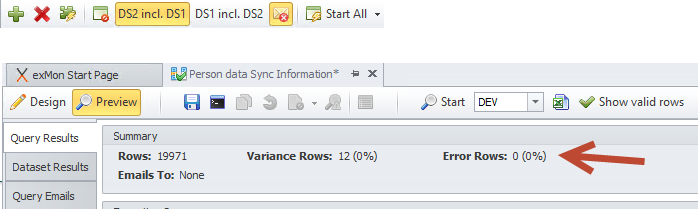
In this example, exMon reconciled 19.772 rows. 12 rows have differences in the LastName and are marked with VARIANCE ERROR. 1 row exists in Data set 1 (ADW1) but does not exists in Data set 2 (ADW2) and results in a KEY ERROR.
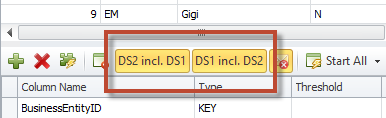
Comparing to sub-sets
If we are comparing two data sets, where one is a subset of the other, we can toggle the "DS1 incl. DS2" and "DS2 incl. DS1" buttons.
For example, we could be comparing a master product list with a product list in a PoS system at a store, containing only the products sold at that location.
- When only DS2 incl. DS1 is checked, and then all key combinations in Data set 1 must exist in Data set 2.
- When only DS1 incl. DS2 is checked, and then all key combinations in Data set 2 must exist in Data set 1.
- When both buttons are checked, then key combinations in both Data sets must match.
- When neither button is checked, then exMon only reports on variance errors on rows that are matched.
In our case, we make sure only "DS2 incl. DS1" is toggled. When previewing the Compare Query again, we can see that the KEY ERROR is gone.
Compare Query Output
Compare Query Results can be used in three ways in exMon:
- A Compare Query can be configured to send out a Summary Email on each execution. The email includes a list of the results and an attached Excel documentation for easy manipulation. Summary emails are often used when something needs to be fixed right away.
- The failure of a Compare Query can be used to stop a process flow in exMon, for example stopping a process if some data does not reconcile.
- If a Compare Query is configured to use Exception management, then exMon will create exceptions for each error and variance row from the results and only send out a notification when new exceptions are found. Visit Configuring Exception Management (Tutorial) for more information.
Summary Email
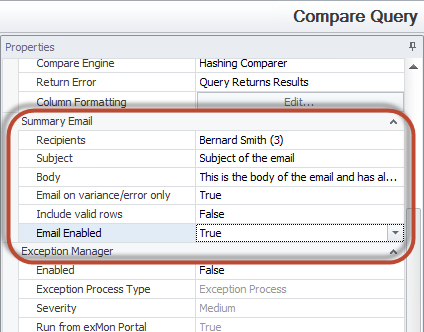
Summary email is configured in the properties pane and when enabled, will always send an email if the Compare Query finds any errors or variances when comparing the data sets.
You then configure the recipient, subject and body.
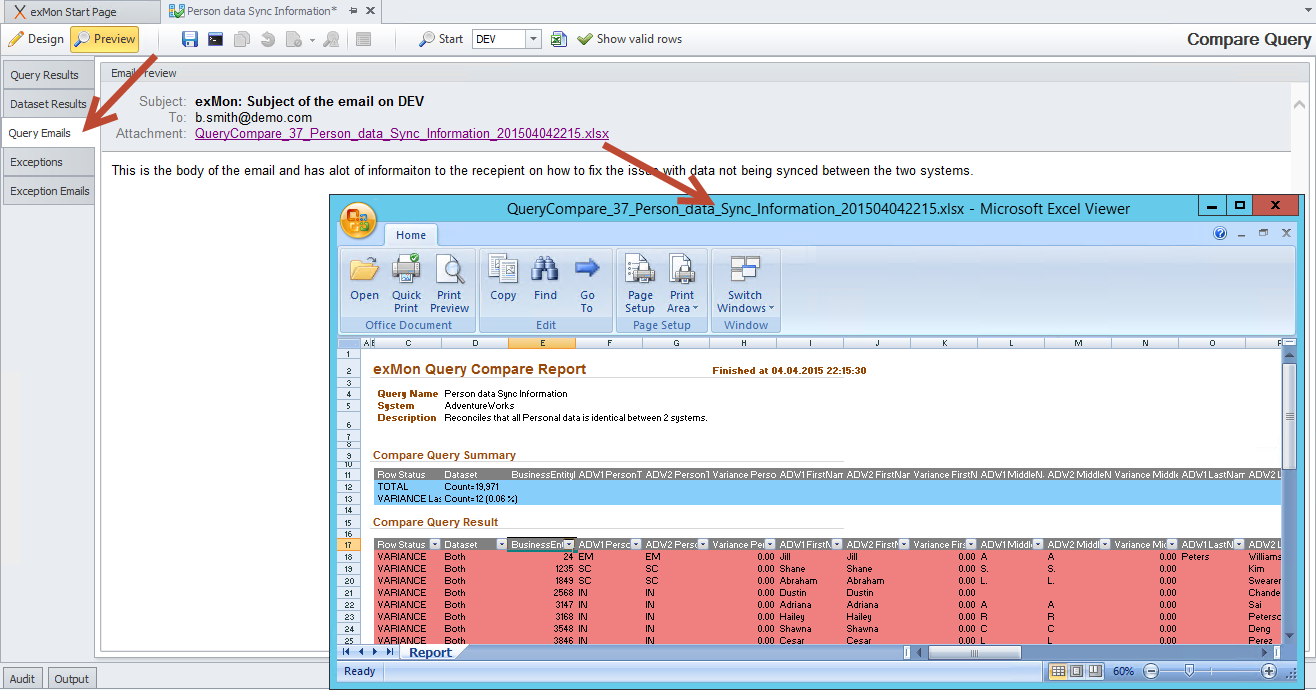
When you test the Compare Query using preview, we now see our email under Query Emails. You can view the email and the Excel document attached with the email.
Column Formatting
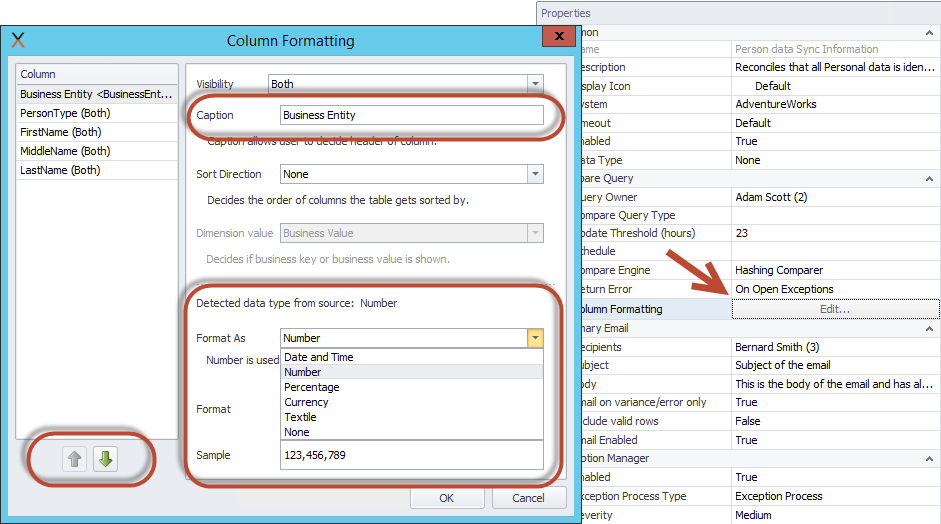
Looking at the results in Preview, you can see that they can be improved to make the data easier to understand. With Column Formatting, you can reorder columns, change captions, format results and hide columns.
Under Column Formatting in the property grid, select Edit
After configuring the formatting, you can preview your changes using Preview.
Exception Management
Basic Compare Queries have no memory of past executions and in each execution, it sends the full results of the Compare Query. The Compare Query can be made more intelligent by enabling Exception Management. Exception Management tracks each row from the results as an exception, keeping track of its lifespan and only notifying users of new exceptions.
You can read more about Exception Management in Configuring Exception Management (Tutorial) and Using the exMon Continuous Monitoring Portal (Tutorial).
