.svg)
Created by: Guðrún Eydís Jónsdóttir
In this article, you will learn different ways to create a new table or import an existing table in exMon Data Management. Tables are the foundation to your success in exMon DM and there are many ways for you to create them.
Specifically, you will learn how to:
Getting Started
From the StartPage, click the button Create Table. In exMon DM, there are three ways of creating a new Table:
- Create an empty Table.
- Import the Table from excel or a flat-file.
- Import Table from Database.
This article will not discuss how to Import a Hierarchy from Excel or a Flat-File.
Create an Empty Table
- Select the Empty Table option and this window will show up.
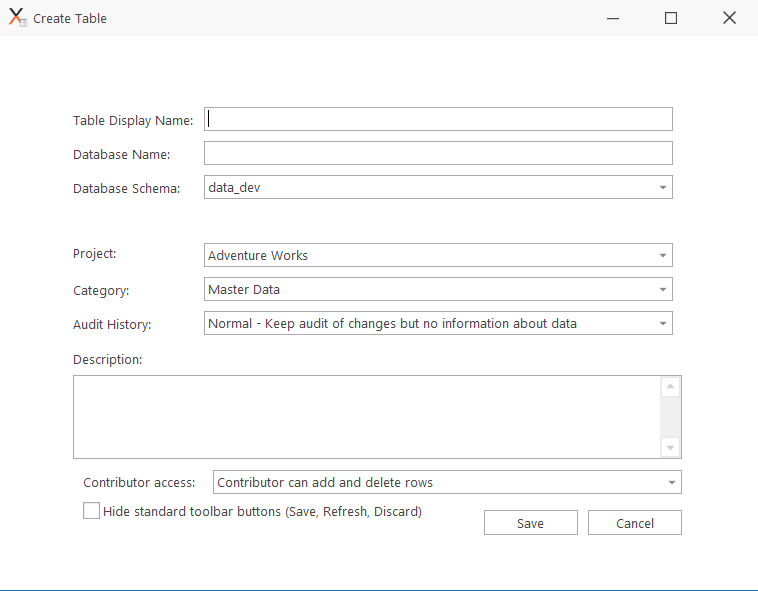
- Fill in the table properties and click Save.
Table Display Name: The display name for the table in exMon DM.
Database Name: Name of the table in the database. Often the same as the display name.
Database Name: Name of the schema where the table is stored in the database.
Project: Select the project where the table should be stored in.
Category: Select the category where the table should be stored in.
Audit History: Can either be Normal or Full.
Description: Write a description of the table that will be visible to all contributors of the table.
Contributor Access: Select if the contributors should be able to add- and/or delete rows or if they should only be able to modify existing rows.
When the new table has been created it will open up and to start editing the table press the Table Designer to create its structure. To learn more about creating Columns please head over to the Column Designer article.

Import Table from Excel or Flat-file.
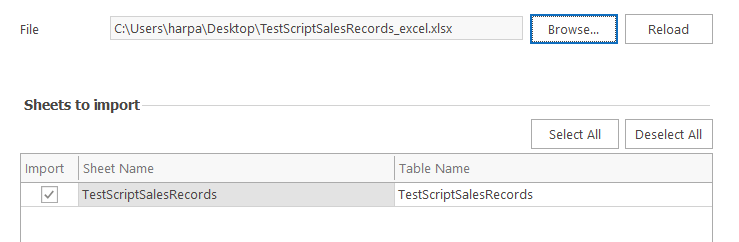
- Select the Import Table from Excel or the Flat-file option. A window with a browse button will show up.
-
Click Browse to find the file that should be imported.
-
Then select the sheets that should be included in the import (each sheet will be imported in a different table).
-
Finally, click Next which will lead you to the configure column mapping window.
-
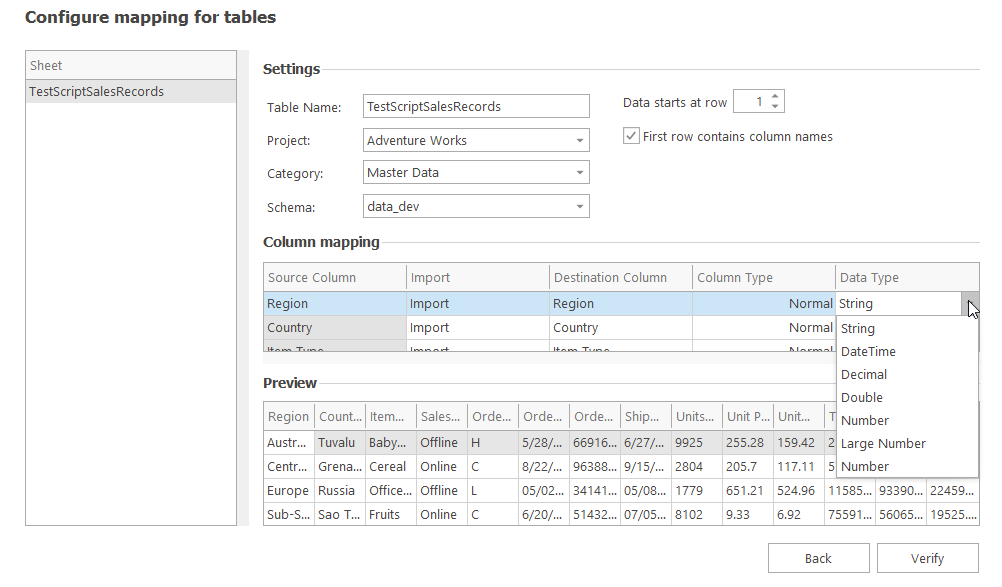
On the left, there is a list of sheets selected for import. It is possible to select different sheets and change their properties. Give the tables different names (exMon DM name) and select at what index the data starts. These changes will affect the Preview at the bottom.
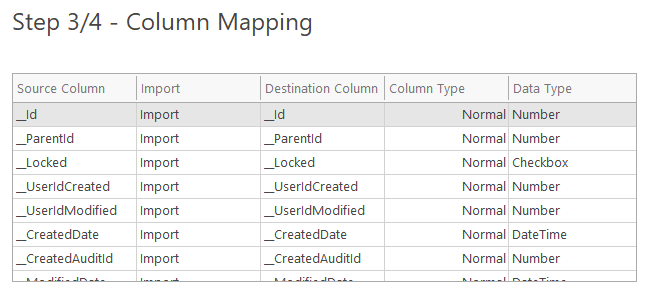
The Column Mapping table is used to change the properties of the columns:
- Import: Either import (include the column in the import) or ignore (do not include the column in the import)
- Destination Column: The name that the column will have in exMon DM.
- Column Type: Currently the only option is Normal.
- Data Type: Specify the data type of the column. Options are String, DateTime, Decimal, Number and Checkbox.
When you are finished, click Verify.
If the import is verified all sheets are marked as Success.
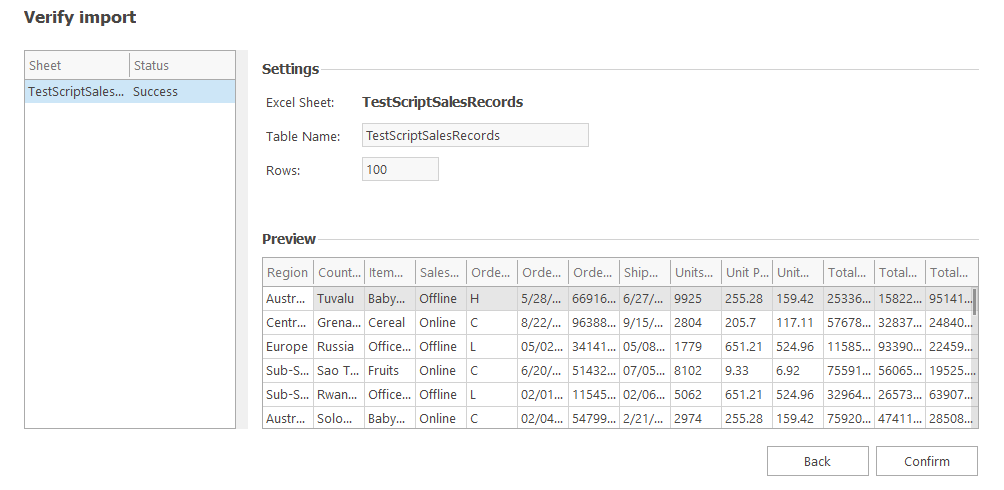
Click Confirm to import the table(s).
If one or more sheets are marked with an Error, you might need to change data types in your column mapping or fix something in the source data. The error message should give an indication of the problem.
When the new table has been created it will open up and to start editing the table press the Table Designer to create its structure. To learn more about creating Columns please head over to Column Designer article.

Import Table from Database
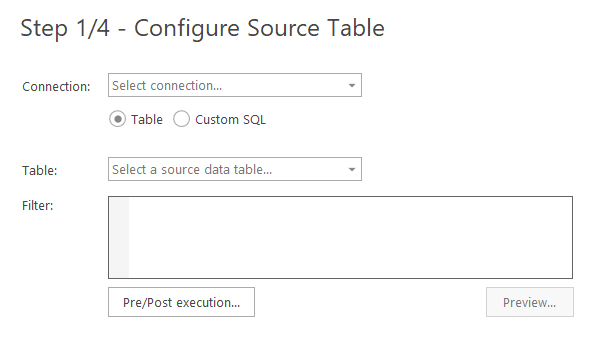
- Select the Import Table from the Database option and this window will show up.
- Connection: Select the Database connection that will be used.
- Table: The name of the table that is being imported.
- Filter: Custom SQL.
The first step is to configure the source table. Fill in the table properties.
-
Press Preview to check if everything looks right and then, click Next.
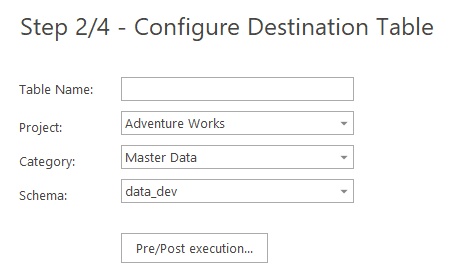
- Fill in the properties and press Next.
- This is the final step before the table will be imported. Check if everything looks right, then press next and the table should be imported successfully.
When the new table has been created it will open up and to start editing the table press the Table Designer to create its structure. To learn more about creating Columns please head over to Column Designer article.

Guðrún is the author of this solution article.